A Recruiter's Guide:
Vibe Code Your First (Free!) Project
A step-by-step guide, that'll take you from zero to your first live build.


You're Not Behind on Vibe Coding.
If LinkedIn makes you feel like you're falling behind with AI. Slow down, you're not.
Everyone's out here acting like they're building apps and automating workflows, but the reality is most people are still just chatting to ChatGPT about dinner recipes. Only a tiny percentage of UK adults even pay for an AI subscription. A fraction of those have tried vibe coding. And an even smaller fraction have actually deployed something live.
This step by step guide is vibe coding stripped back to its bones. At the end, you'll walk away having created your first live project, which is more than 99% of people have done.
The entire guide can take just 30 minutes to complete!
...or more depending on how much of a perfectionist you are, or if you get hooked on vibe coding :D
If you've used AI to tidy up emails, plan holidays, or pretty much anything else...then you have enough experience to complete this project. In fact, this is the perfect next step on your journey to becoming an AI enabled recruiter.
So, What Will We Build?
Together, we're going to build a digital interactive CV!
The CV is a great first build, because you already know the document inside out. But more importantly it's a build that carries zero risk - no client data, no sensitive systems, and no pressure to deliver value. Just you experimenting and learning how this stuff works.
Note: While this could be used as a job-seeking tool, the primary goal of this guide is getting more recruiters to take their first step with vibe coding.
Plus, every recruiter has opinions on how the CV could be designed better. Not surprising given it's barely changed in a century. But the ability to actually do something about it was always out of reach...
Until now!
This is your chance to build the CV you've always wished you'd receive.
This project has been structured in a way to remove any risks. AI can't access anything on your computer, only what you put into the chat. It's just you, a chat window, and the freedom to experiment.
What You'll Learn
Along the way you'll pick up how to:
- Turn a chat prompt into a working prototype
- Use Claude as a creative partner to brainstorm design ideas
- Refine and edit everything using natural language, no code
- Store your build in a safe and accessible place
- Launch your project onto the internet
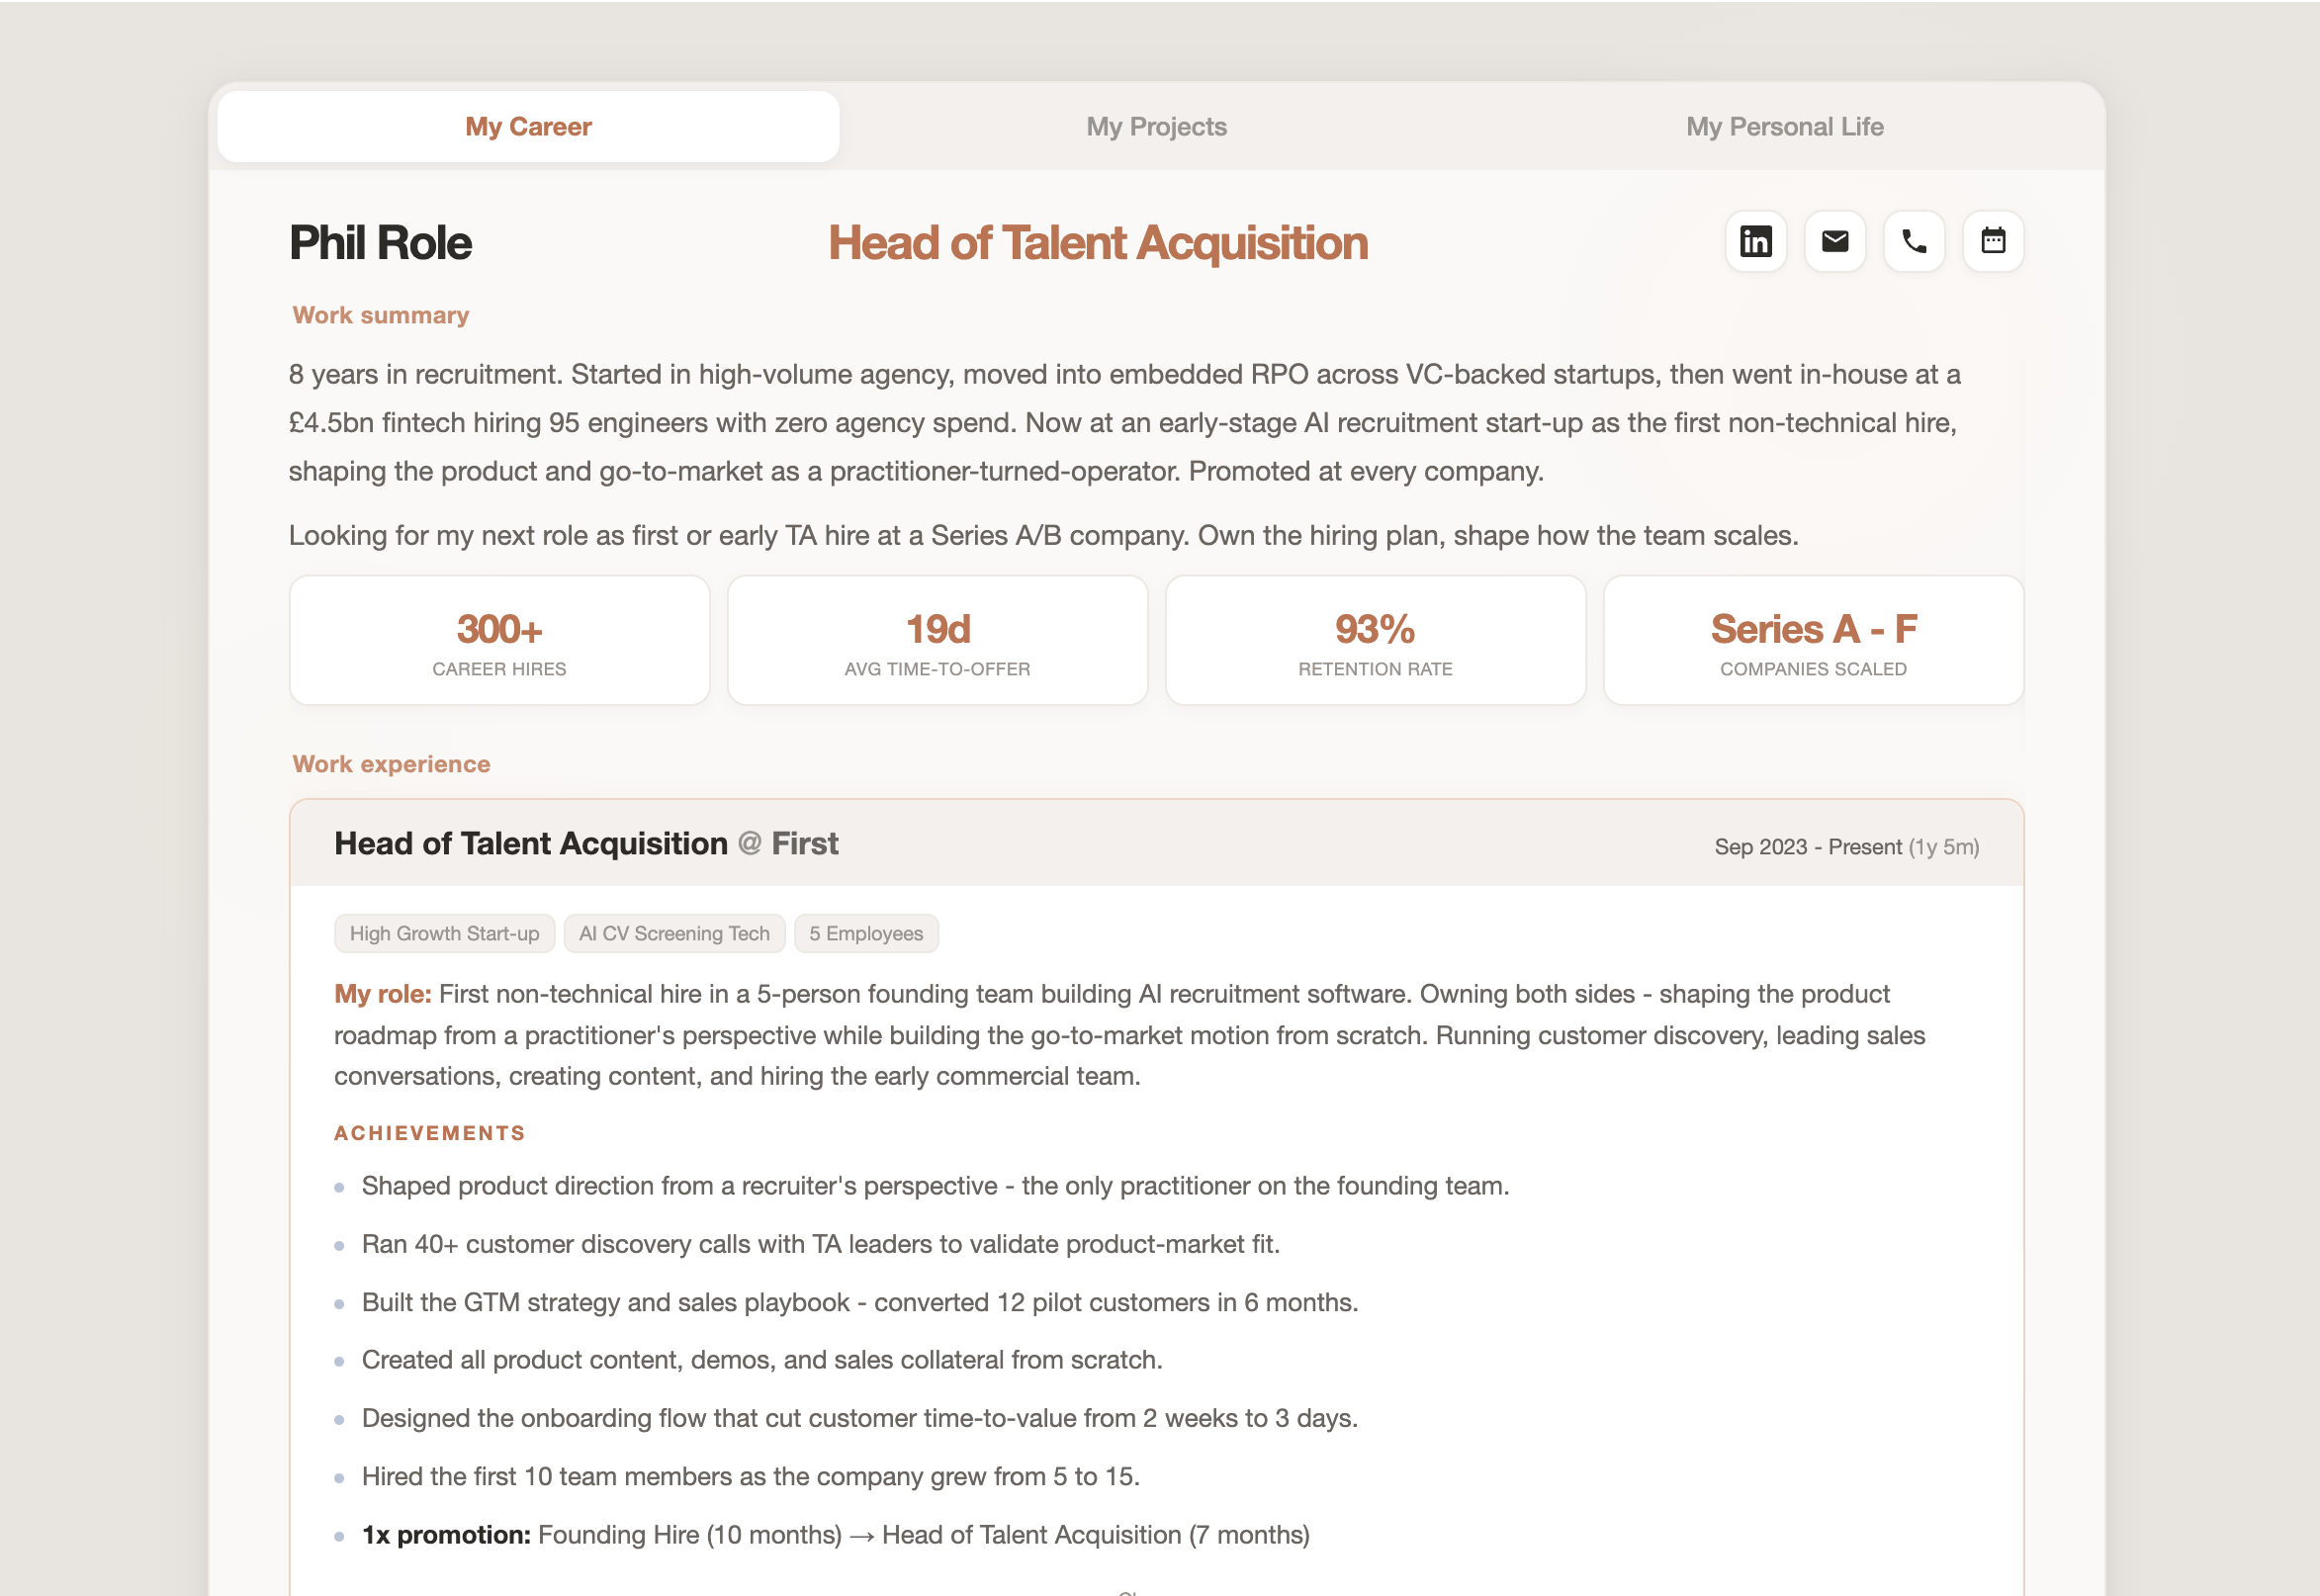
And without writing or reviewing a single line of code, you'll walk away with a sharable digital CV link! Here's an example we had fun with.
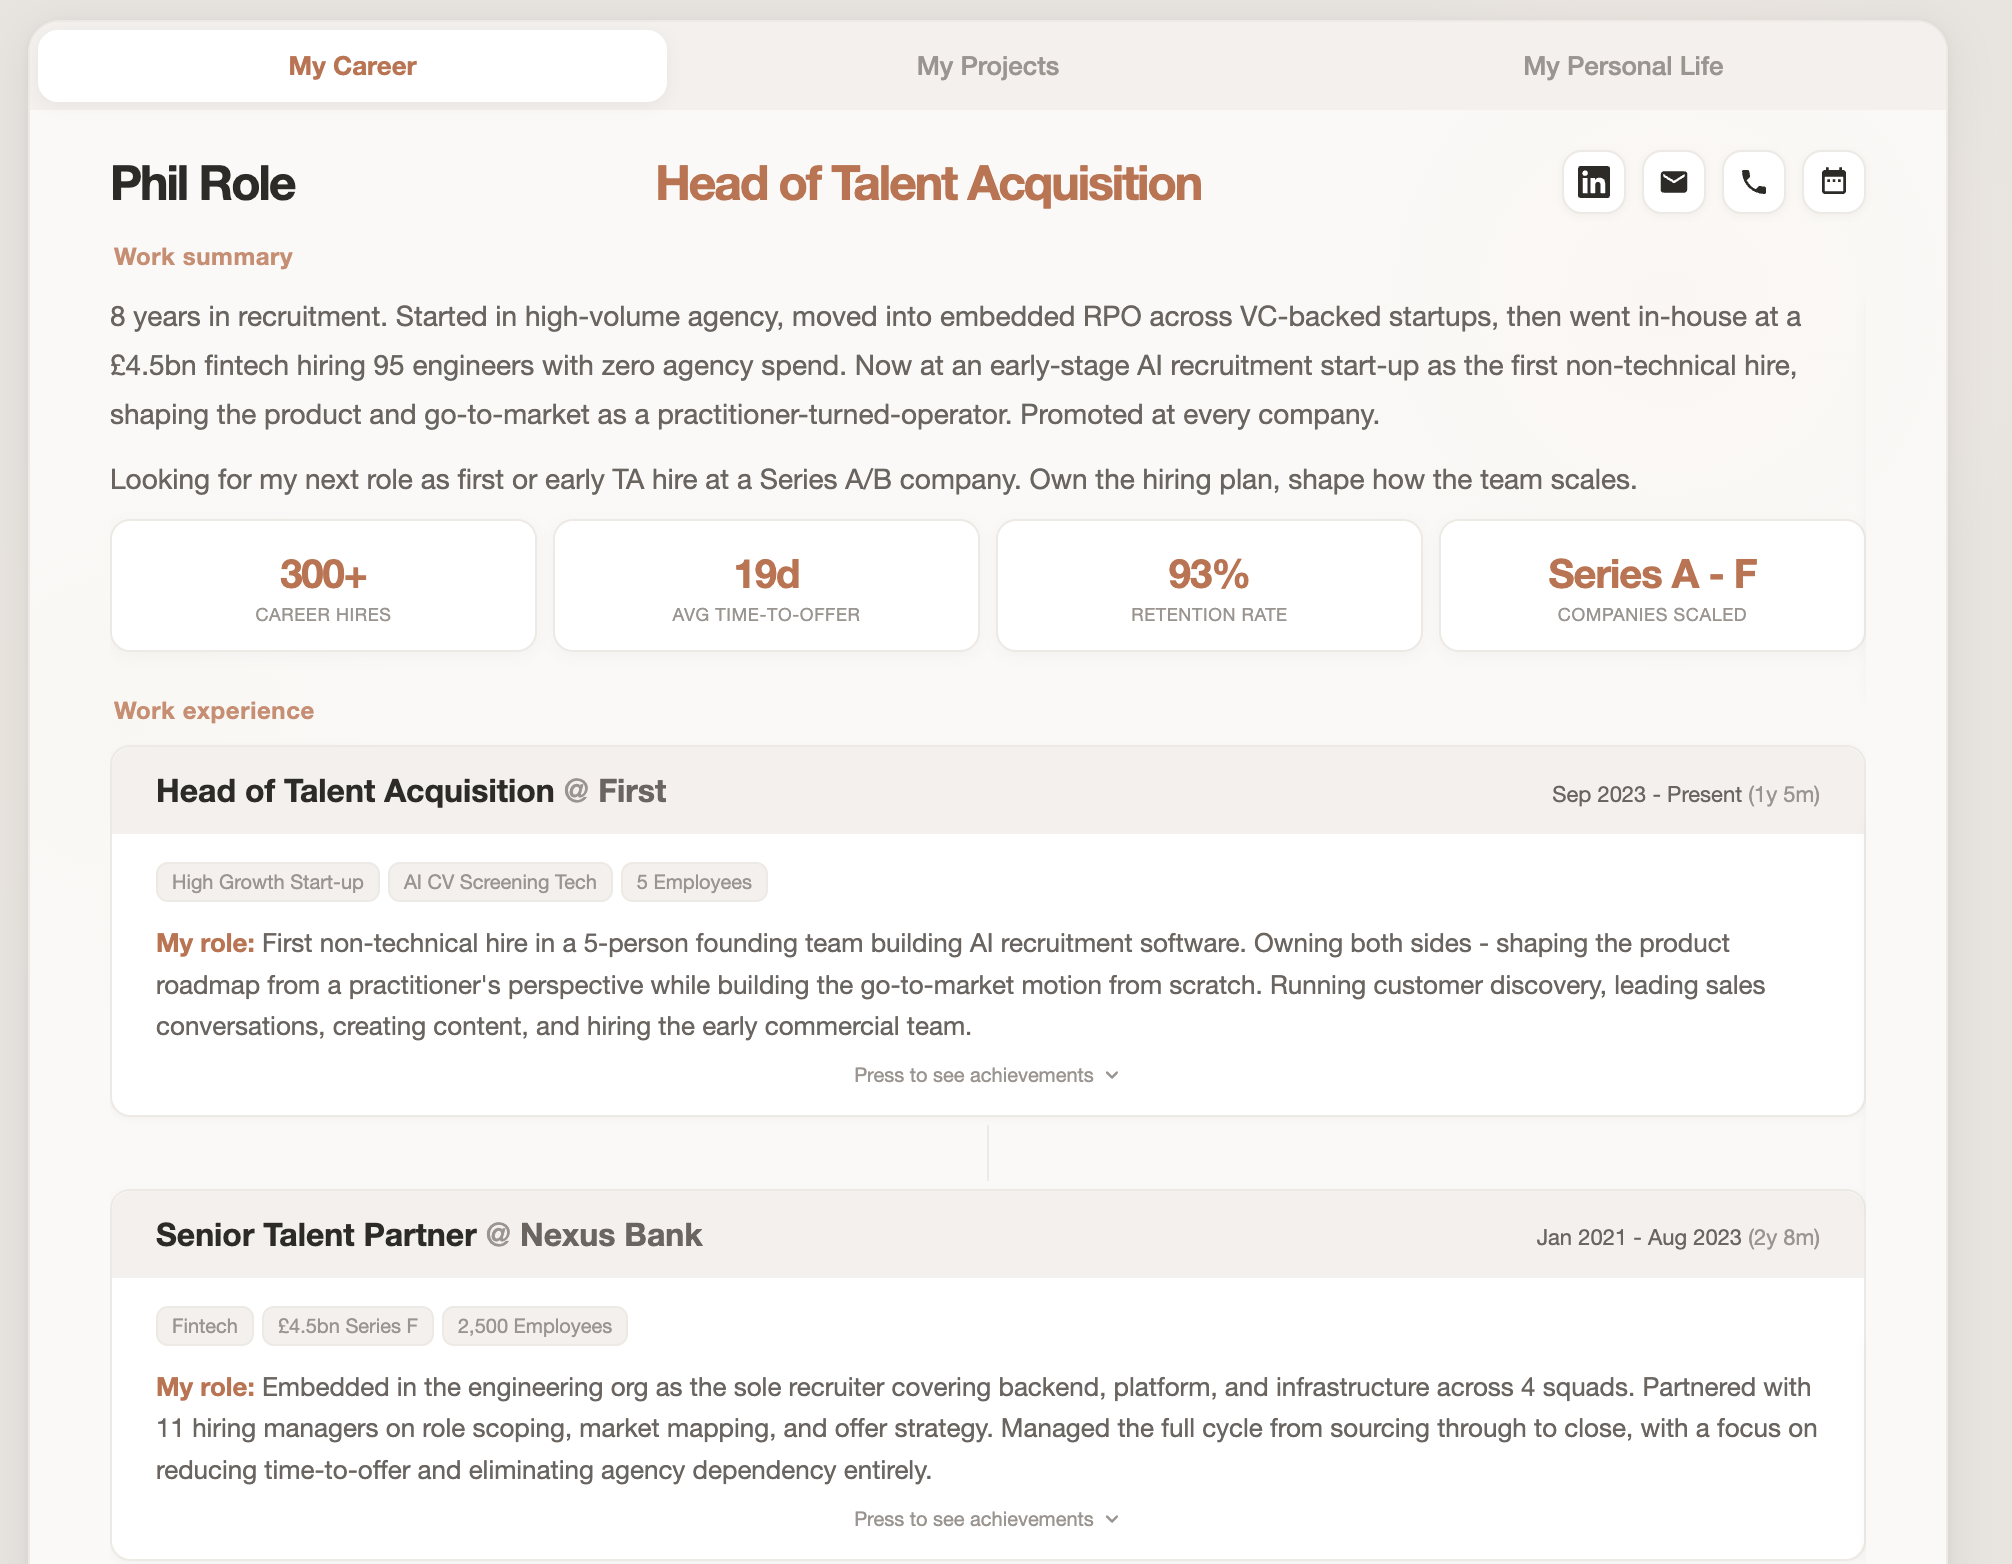
However, what your end result actually looks like is up to you. Add tabs, FAQs, pictures, logos, animations, timelines, styles, colours, embedded links, whatever feels right. This guide gives you the tools, but the creative decisions are yours. Let your personality shine through, which is the beauty of vibe coding.
Note: If you're hoping to share your build publicly, to share what's possible and inspire others, but would rather not share your own CV data; no problem. Use CV with fake data instead.
Part 1: Building Your Digital CV
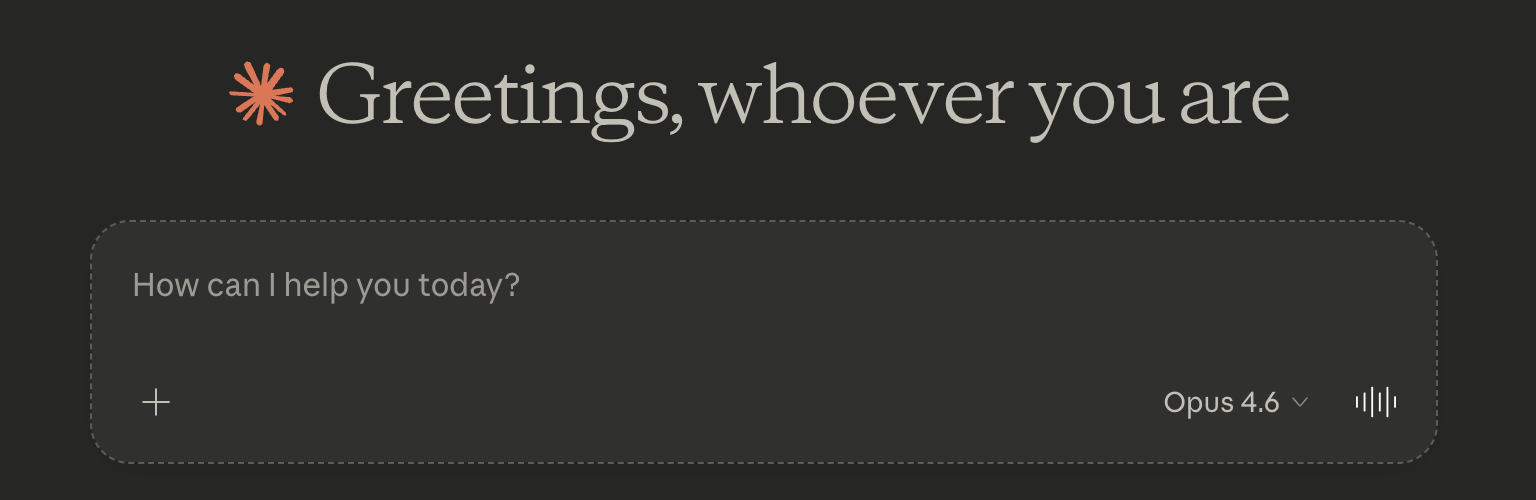
For the build, we will be using one of the hottest AI tools right now, Claude. Open up Claude to create an account (if you haven't already), then start a new chat.
Inside Claude is where you'll spend most of your time, and it all happens in a single chat window. Exactly how you'd be familiar with in ChatGPT, Gemini or any other LLM. No downloads, no installations, no technical jargon or tab switching. Just you and Claude talking in natural language.
Step 1: Define Your Project
Before Claude can help you build anything, you need to share what your goal is. So the first action is to define your project.
There's a few ways to tackle this. You can even ask Claude to help you figure it out. Try a simple message like:
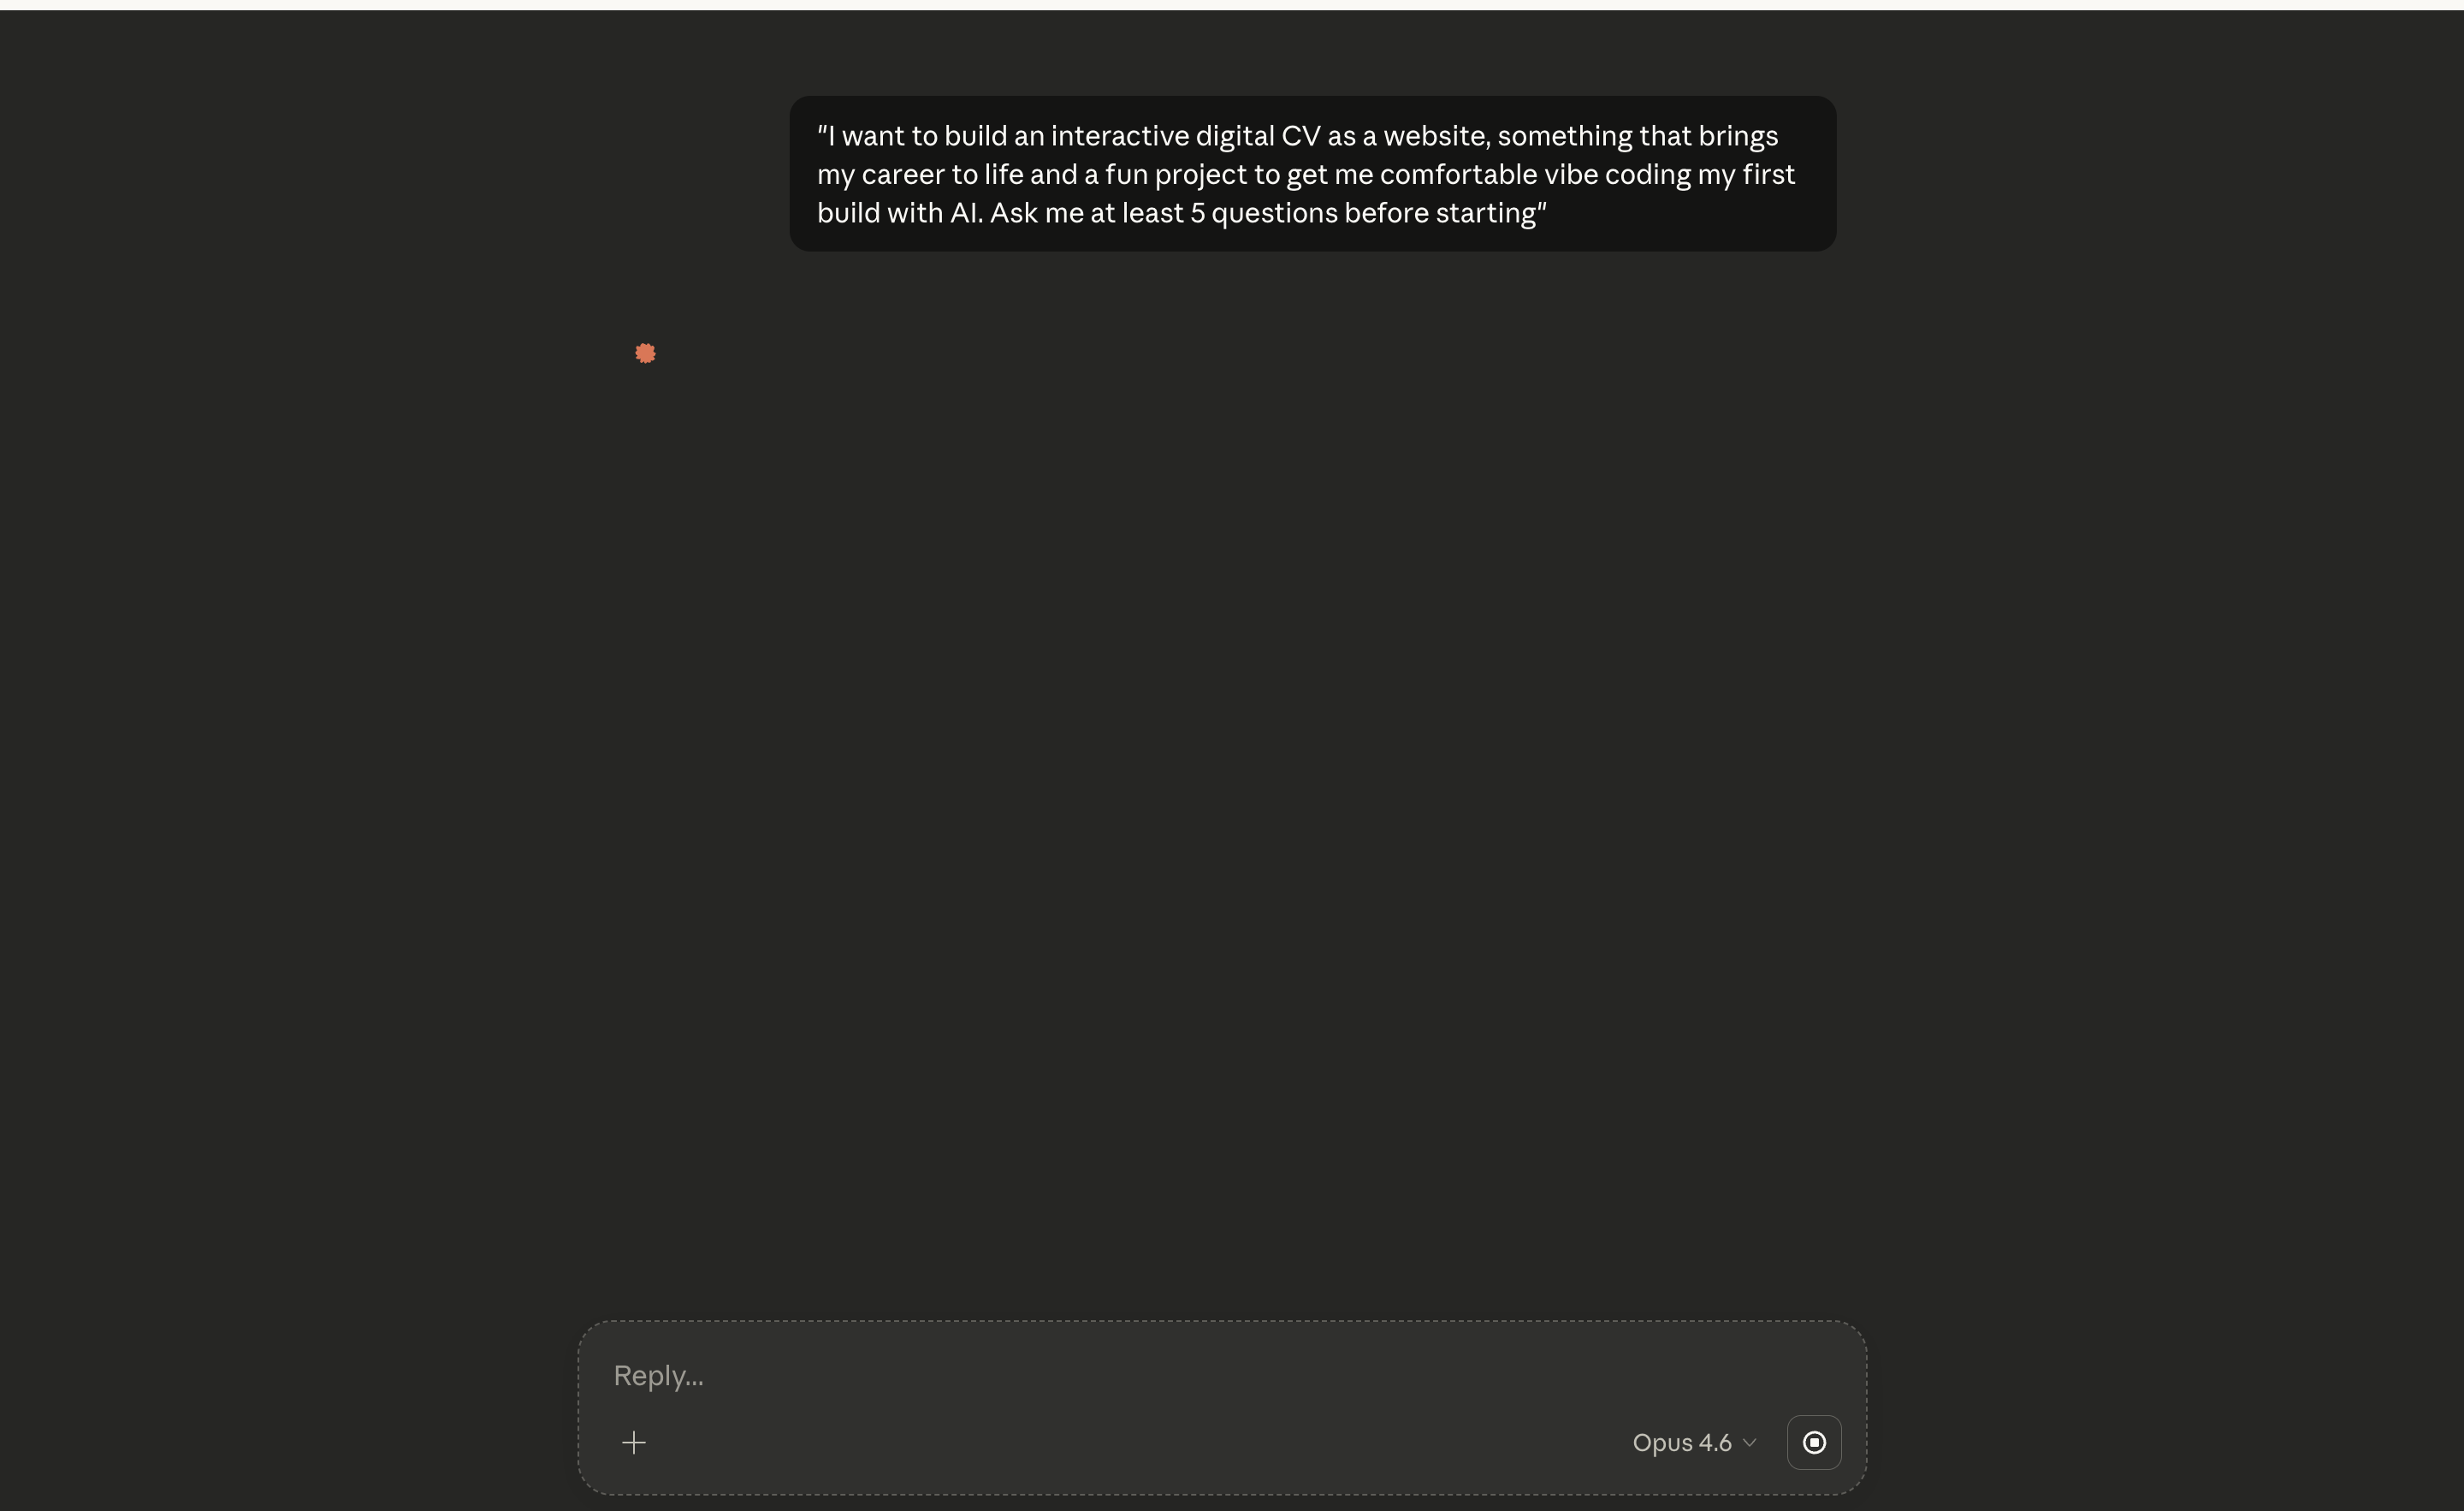
"I want to build an interactive digital CV as a website, something that brings my career to life and a fun project to get me comfortable vibe coding my first build with AI. Ask me at least 5 questions before starting"
By adding "ask at least 5 questions", Claude will clarify some points to get a better idea of your vision. Likely the sections you want, what design style, what tone, and more. Answer them as they pop up, and Claude will put together a project plan tailored to your answers. Then from there, it'll start building.
Alternatively, once you get a bit more comfortable, you can build a more comprehensive prompt brief upfront rather than relying on Claude to ask the right questions. This approach gives you a lot more precision with the initial build. Here's an example of what that brief could look like:
"You're a senior product designer who specialises in recruitment and personal branding websites. Think clean, modern design. Notion-style simplicity with subtle polish. It should be easy for recruiters to read and extract information from.
I'm a recruiter with 8 years of experience. I want to build an interactive digital CV as a website to experiment with AI and see what's possible. Something that brings my career to life and could eventually be shared with hiring teams. Here's what I want:
- A warm, professional design (think cream/terracotta tones, not corporate blue). Nothing that looks like a LinkedIn PDF export
- Three tabs: My Career, My Projects, My Personal Life
- My Career should have: a headline with my name and title, a short summary paragraph, animated stats (e.g. '300+ career hires'), and expandable role cards for each position showing company, dates, my role context, and key achievements
- My Projects should be clickable tiles that open an overlay with a full breakdown of each project
- My Personal Life should be light and human: hobbies, values, a bit of personality, and some spaces for photos
Here's my career data:
[paste your roles, achievements, stats here, or attach your CV]
Here's a site I like the feel of because of X, Y and Z: [paste a link or share images to any website or portfolio you've seen that inspires you]
The page should feel interactive and alive, things that respond when you click or scroll. Make it feel premium but approachable.
Before you build, ask me any questions you need answered."
Don't worry about getting overwhelmed by this longer prompt. It's a lot to digest not overly important at this stage. The most important thing is getting started, and both prompts will do exactly that.
But for the sake of understanding 'why' this longer brief is an improvement on the first one, let's break that down.
Why This Brief Works
- We gave a persona. We told Claude who it's acting as. "You're a senior product designer who specialises in recruitment and personal branding websites" gets a completely different result than no direction at all. It sets the quality bar before Claude writes a single line.
- We stated our audience and purpose. Who might eventually see this, and why are we building it? "To experiment with AI and see what's possible" gives Claude context that shapes everything from tone to layout. Mentioning the audience, like hiring teams, helps even more.
- We were specific about design. "Warm tones" is better than "make it look nice." We referenced things we've seen: "like a Notion page" or "cream background, terracotta accents."
- We included our data. Don't say "add my roles". Paste them in or attach your CV. The more real content and context Claude has, the better the output.
- We described what we want to see. "Expandable cards that reveal achievements on click" is better than "interactive role section." If you have a vision, describe it. It stops Claude guessing.
- We said what we don't want. "No corporate blue, no stock photo energy, nothing that looks like a LinkedIn PDF export" is just as useful as saying what you do want.
- We shared examples. If you've seen a website, portfolio, or design you like, share the link. Claude can work from references.
- We ended with an invitation. Adding "Before you build, ask me any questions you need answered" means Claude will flag anything unclear rather than making assumptions. Great if you're not sure your brief covers everything, or to fill any blind spots.
In a nutshell: The more context you cover, the closer the first prototype will be to your vision and it's likely to need fewer refinements.
Right. Now back to the task. Once you've written your initial prompt, whether you've kept it short and sweet like the first example, experimented with the longer second example, or anything in between, hit send, and Claude will get to work on your prototype.
Note: If for whatever reason it didn't start building, follow up with "Start building it please!"
Then feel free to go and make a tea whilst your colleague works away for a few mins :D
Part 2: Review and Refine Your Prototype
Claude will now have generated your digital CV as a file that appears next to the chat. Click on this file and a preview of your CV will pop up. You can scroll through it, click around, and see exactly what it will look like. It's not a mockup. It's working code you can interact with!
Note: if you can't see the file, no stress, just say "Can you put the HTML file for this build in the chat"
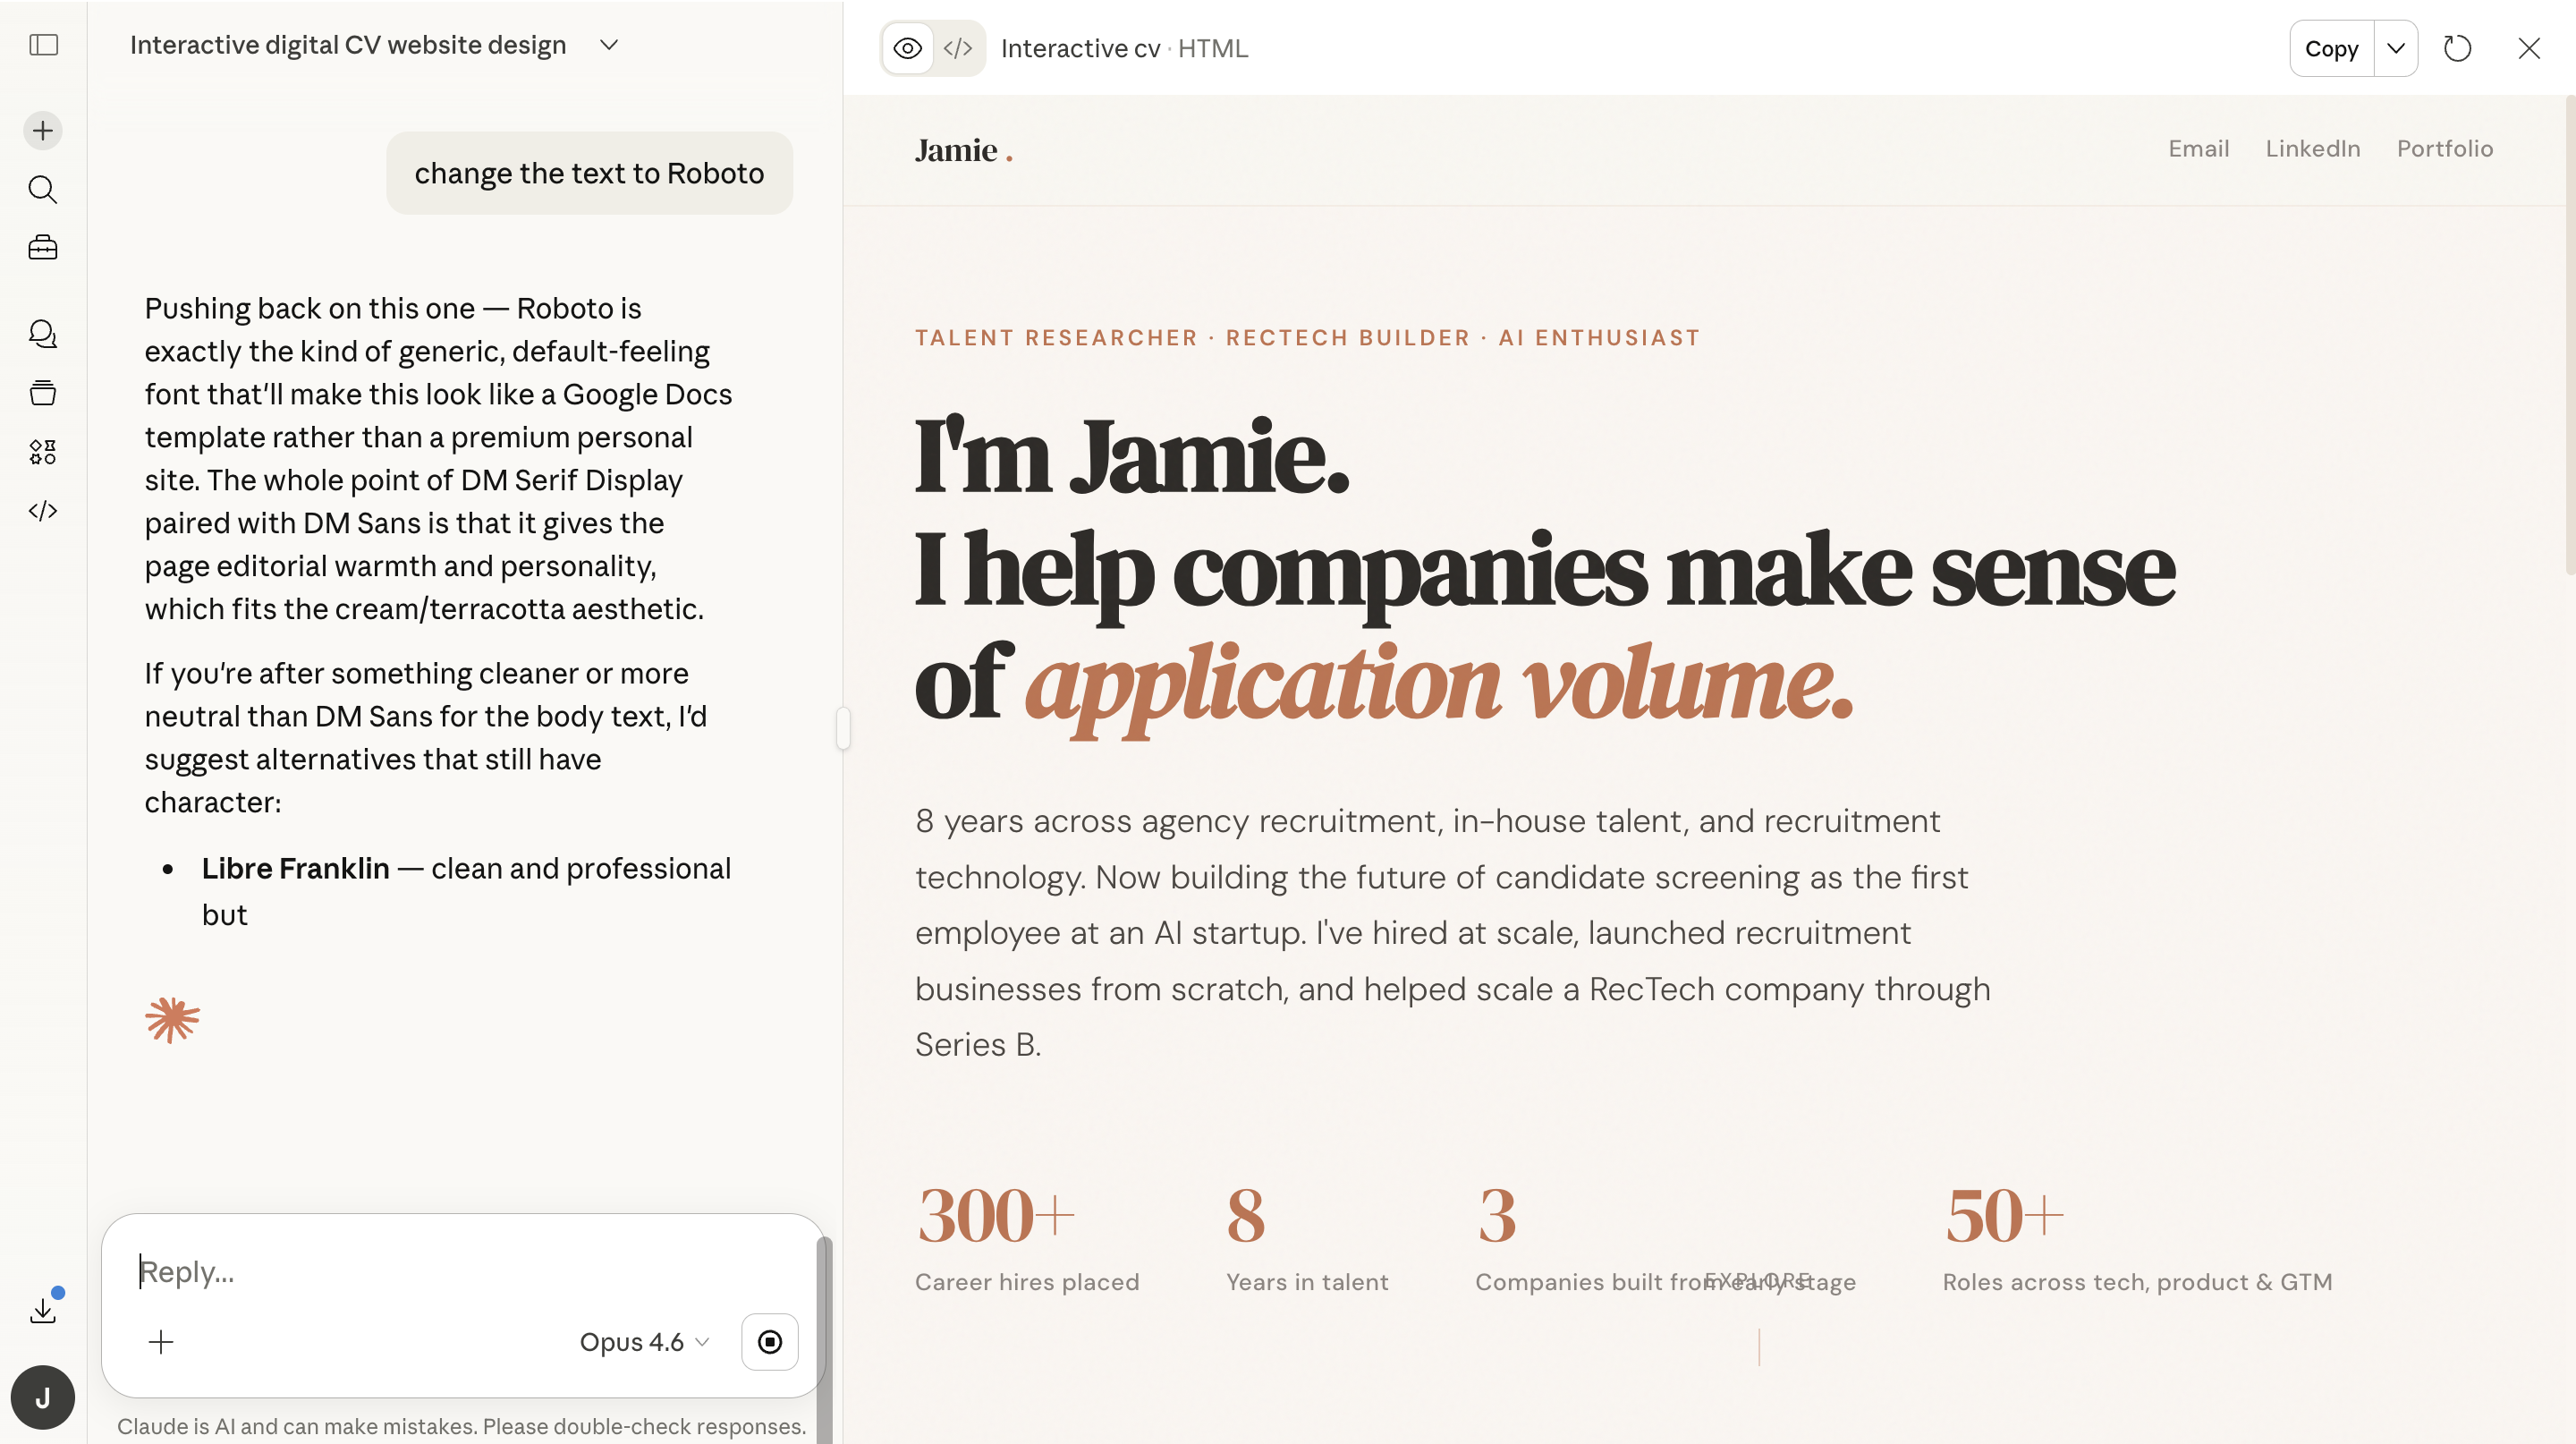
Congratulations. You've just built your first prototype! How quick and easy was that?
Before we get into the fun part, send a message to Claude saying "please make sure this file is a HTML". HTML is a coding language, and it's one of the most beginner friendly ones.
Now, don't expect it to be perfect first time (it never is), but here's where the real collaboration and design starts.
Let's start by singling out one thing you'd like to change. Maybe it's a colour that doesn't feel right, a font you're not keen on, or a section that's not designed how you'd like. Just focus on that one thing, which can be anything, and describe what you want to change in the chat to Claude.
The key here is being specific. "Make it look better" gives Claude very little insight into your vision. Whereas, "I like the cream/terracotta palette, but the role cards look flat overall. Add a subtle border and a hover effect that lifts the card slightly"... That's a clear edit Claude can act on.
The best way to think of your relationship with Claude is as a consultant you've hired. You're the creative director, Claude is doing the technical work. Communicate exactly how you would with a human colleague. No code, just clarity.
Literally just write feedback in english.
Then once you've got the first editing prompt ready, hit send and boom! You've just made your first refinement.
Some example prompts for inspiration:
- "The career section feels cluttered and hard to scan. I'm not sure what's wrong but it doesn't feel clean. What are my options?"
- "Add a connector line between each role on the work experience cards so it looks like a timeline"
- "The stats section feels cramped. Space out the numbers and make them more visual, like a recruiter dashboard. Have a bit of fun I'm stuck on design ideas here"
- "Change the tab font to Roboto, make the active tab terracotta with white text, and add a smooth underline animation when switching between them."
- "What are my design and animation options for the projects section? Show me a few different directions."
- "I'm stuck on how to lay out my career history. Give me 5 options: 3 clean and simple, 1 completely out there, and 1 surprise me."
Once Claude has made changes review them, continuing to suggest any further tweaks, back and forth until you're happy with what's been built.
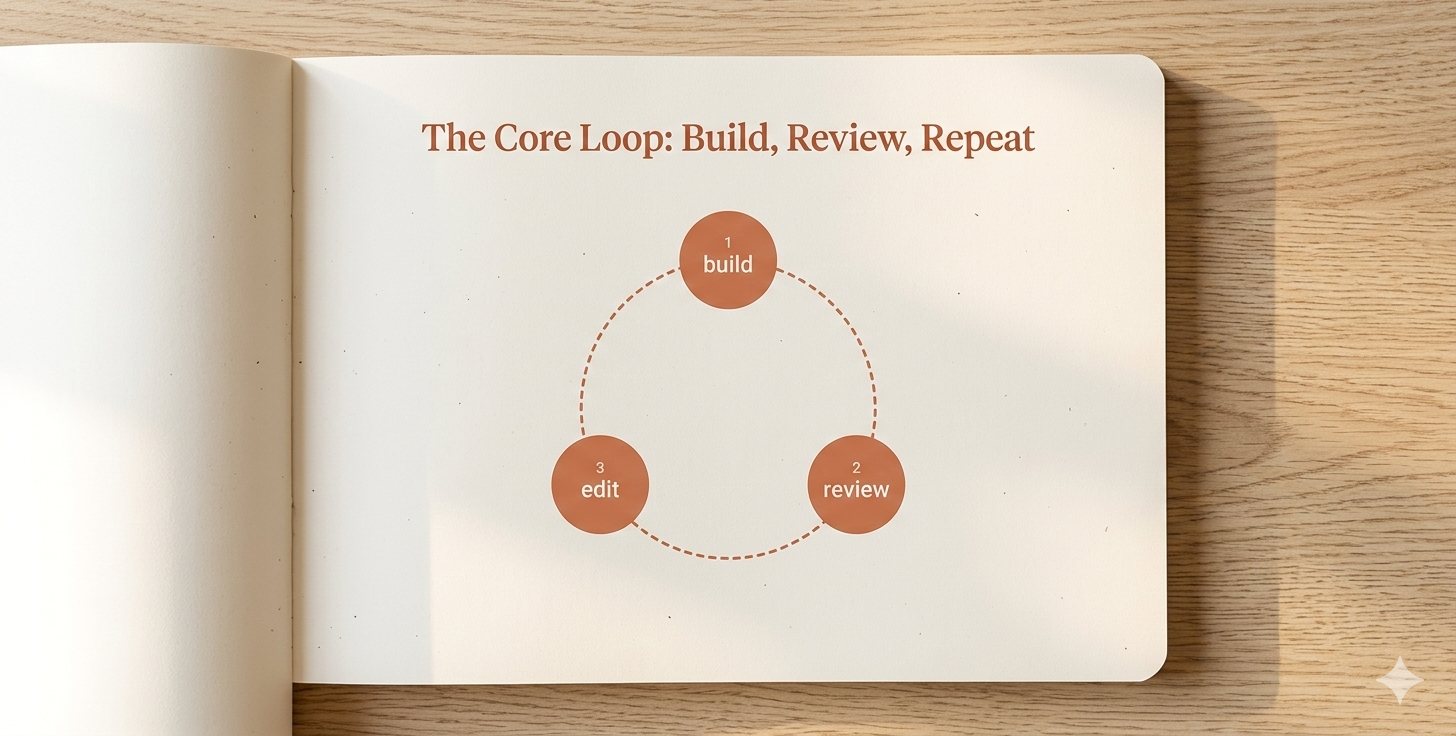
Then rinse and repeat this process!
Keep picking at specific refinements for your digital CV, section by section, poking around and experimenting, and then when you're happy with the build, come back, because we're about to cause some chaos...
Now Time To GO WILD
Cool, so you've been making sensible refinements to create a sleek design...now let's do something completely daft. It might just open your eyes to some of the capabilities Claude has, even with no connectors that enhance the tool.
"I want to see the full variety of what you can do. Go over the top. Elements flying in from every direction, text that types itself out, stats that count up from zero, parallax scrolling, hover effects on everything, confetti when you reach the bottom. Prioritise showing me features over making the design good. I want to understand what's possible. Imagine I'm applying to be a clown at a kids birthday party and I need to show my personality through this. Use lots of colour but make it look professional still."
In about 60 seconds, your clean CV will transform into something that looks like a clown's portfolio. Rainbow gradients, bouncing elements, the lot. It'll be ridiculous. And every person who does it will get a different result!
Pushing boundaries and light hearted experimentation often teaches you what's possible, and can even inspire some ideas that will actually impact how you design your real CV.
But another important lesson we're showing you here: if you don't like it, just tell Claude to undo it. Try, "Please remove the clown changes and go back to how it was before them." That's it. Nothing is permanent, nothing is broken, and you haven't lost any work. Once that clicks, that you can try anything and reverse it in seconds, you stop being precious and start being creative. That's when vibe coding gets really fun!
And that swiftly wraps up section 2, refining and editing your build with Claude. Once you're done editing, it's time to save this somewhere people can actually see it. Because at the moment it's only saved locally, meaning it's only visible on your device!
Part 3: Storing Your Build Somewhere Safe
You'll notice Claude has been sending you your code in a file. This is the file that contains everything for your digital CV, and it's what we need to turn it into a live site. To turn this into a live website, we first need to save the code somewhere online. That's what GitHub does. Think of it as an online folder for your project.
Step 1: Download Your File from Claude
- Click the dropdown arrow in the top right of your CV preview in Claude
- Download the file to your desktop
- Rename the file to
index.html("index" is a standard term used to tell platforms that this is your home page)

Step 2: Create a GitHub Account
If you don't have one already, go to github.com and sign up. It's free.
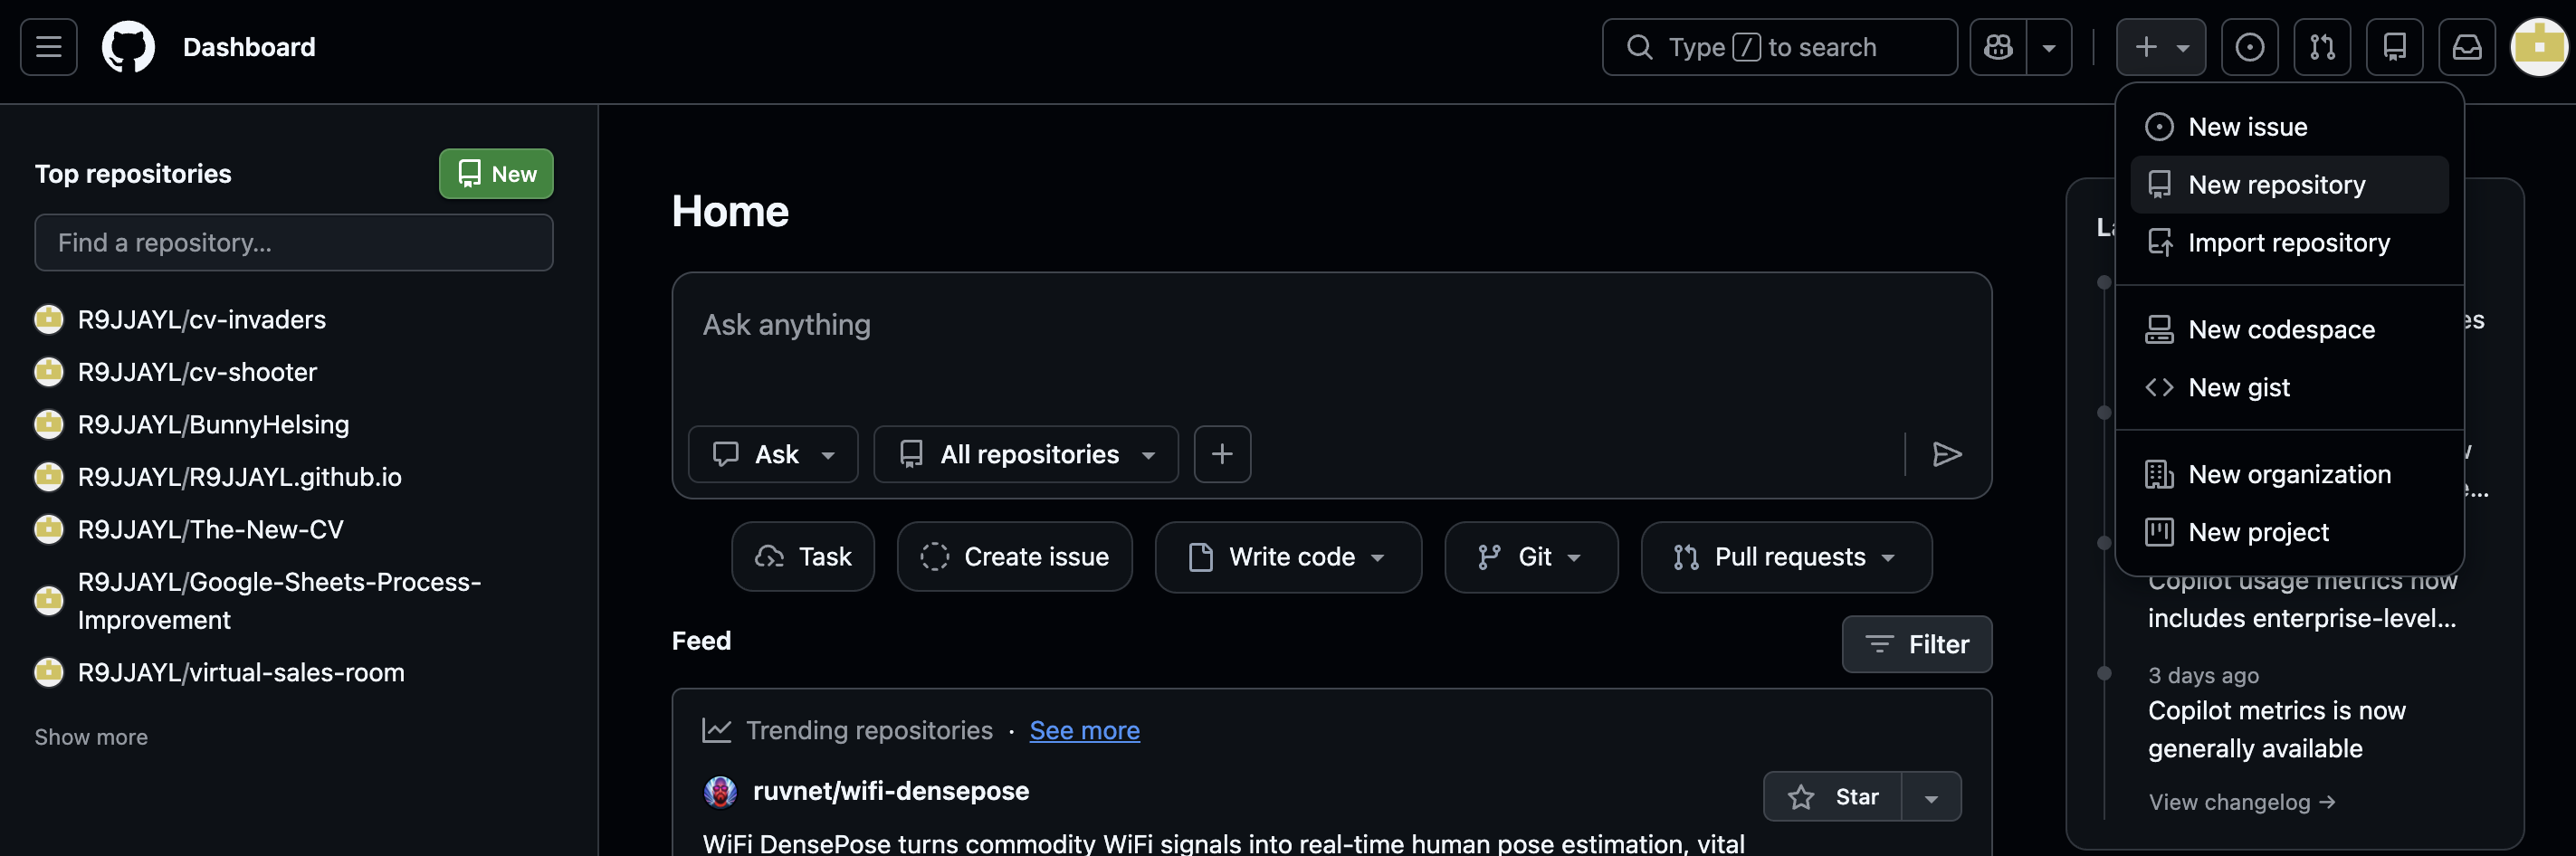
Step 3: Create a New Repository
A "repository" is just a folder for holding code, same idea as a folder on your desktop, but it lives on GitHub instead. Don't overthink it.
- Click the + button in the top right → New repository
- Name it something like
my-digital-cv - Keep visibility on Public (needed for free hosting later)
- Click Create repository
Step 4: Upload Your File
- In your new repository, click Add file → Upload files
- Drag and drop your
index.htmlfile, or click to browse for it - Click Commit changes
(Good news: tools like Claude Code can automate all of this uploading to GitHub. We've gone manual here to keep your first build simple and risk-free.)
Great, now that you've stored your code in an accessible place, it's time to turn it into a live site.
Part 4: Time to Go Live!
Now your code is sitting in a GitHub folder. It's stored, but nobody can view your project as a website. Vercel is one of the tools that can change that. It reads the code from your GitHub folder and turns it into a live website with its own link. Think of GitHub as the filing cabinet and Vercel as the shopfront.
Step 1: Create a Free Vercel Account
- Go to vercel.com
- Click Sign Up
- Choose Continue with GitHub (this connects your accounts)
Note: If "Continue with GitHub" doesn't appear or doesn't work, just sign up with your email instead. Once you're logged in, go to Settings → Git Integration and connect your GitHub account from there.
Step 2: Import Your Project
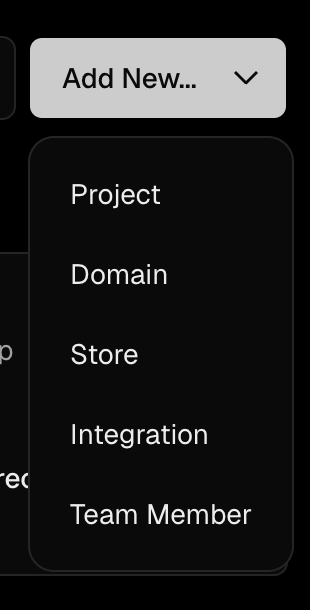
- Once logged in, click Add New → Project
- You'll see your GitHub repositories listed. Find
my-digital-cvand click Import - Leave all the default settings as they are
- Click Deploy
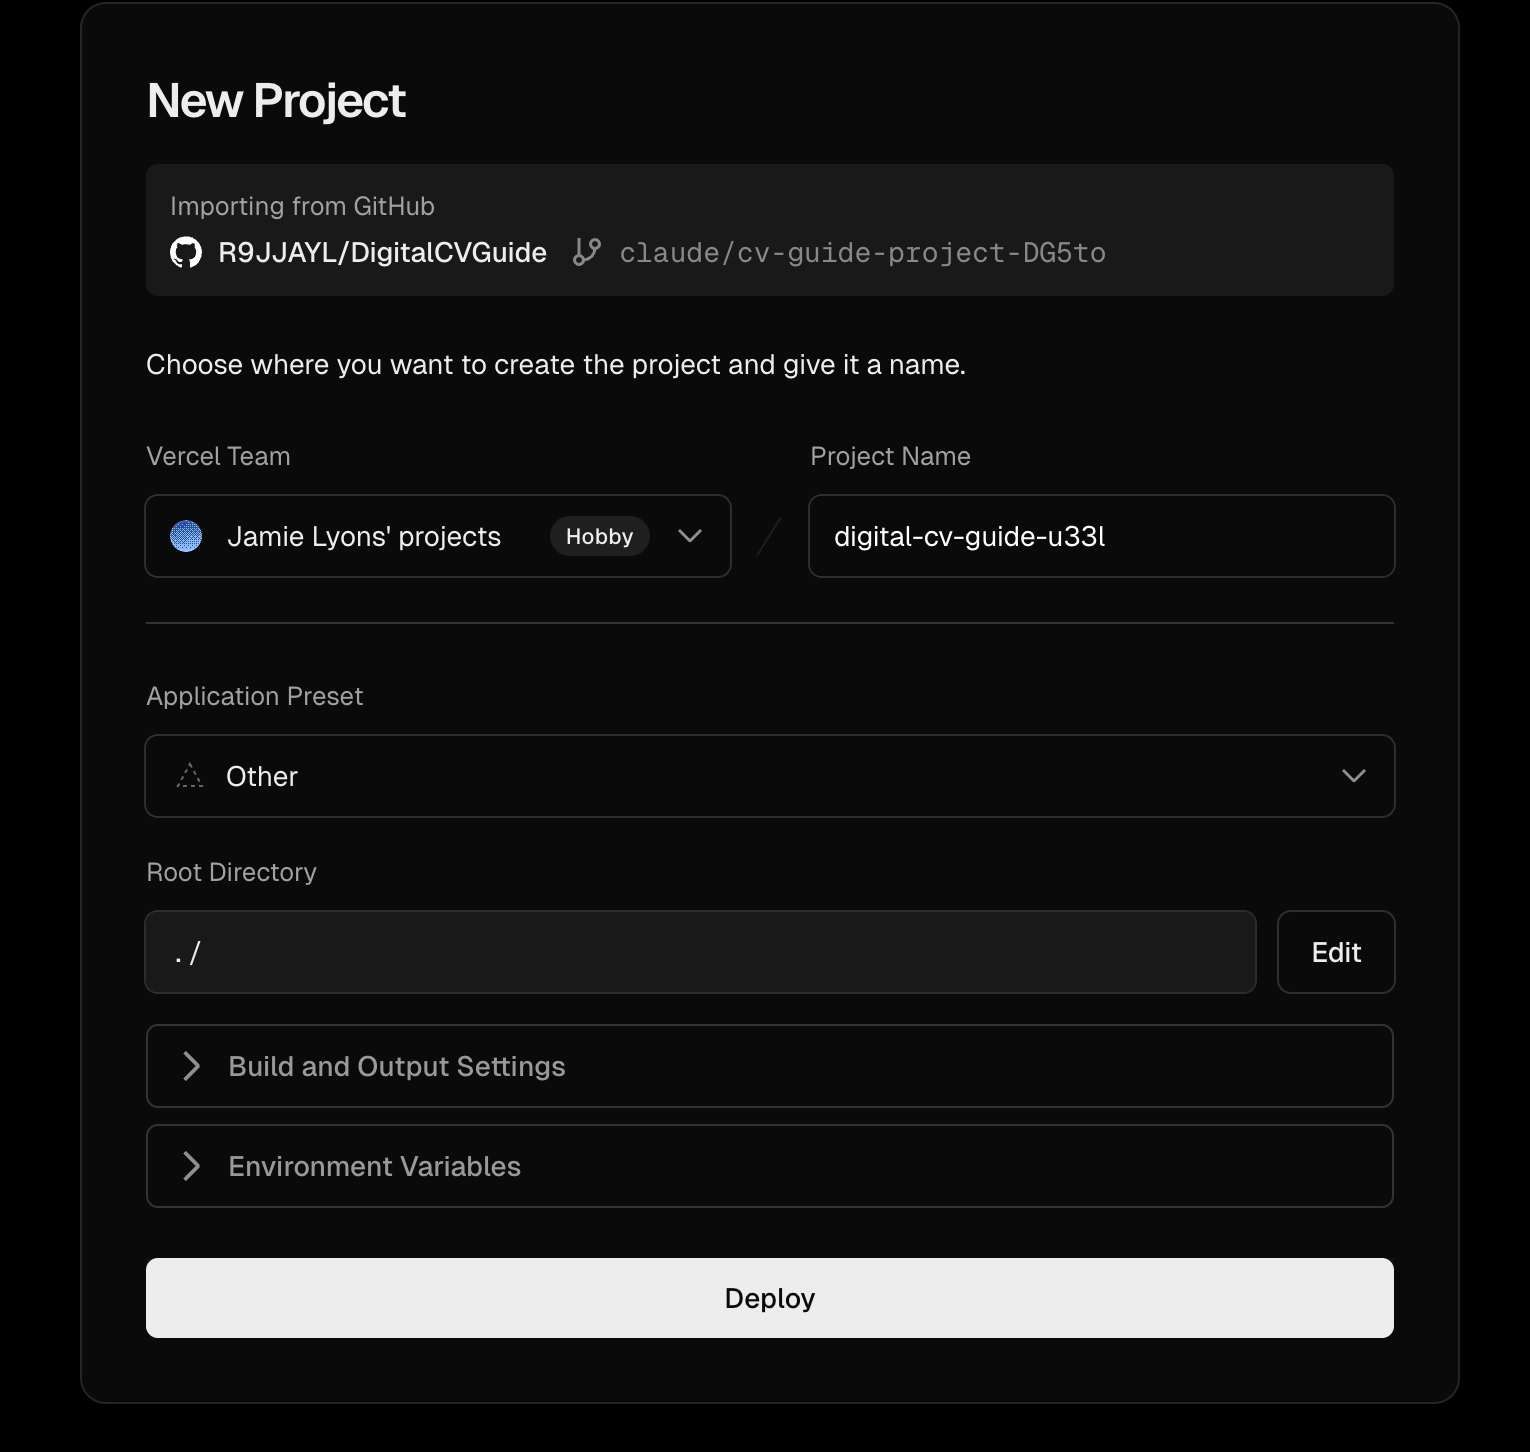
Wait about 60 seconds. That's it. Your CV is live.
Vercel will give you a URL like my-digital-cv.vercel.app. That's your live site. Share it anywhere.
Every time you update your code on GitHub, Vercel automatically rebuilds your site in about 60 seconds. Make changes in Claude, paste them into GitHub, and your live site updates itself.
Quick Reference: The Full Workflow
Here's the entire process at a glance:
1. BUILD       → Design and iterate your project in Claude
2. UPLOAD      → Store your HTML file in GitHub
3. DEPLOY      → Connect GitHub to Vercel → your site is live
What's Next?
Congratulations. You've gone from a chat prompt to a live website. That's not a small thing. It's your first step into the future of how humans will work, and you're now in the tiny percentile of people who've actually built and shipped something with AI.
Once your CV is live, here are a few things worth trying:
- Polish it. Make it mobile-friendly ("Can you make sure this works well on mobile?") and upload your brand assets: logos, colours, fonts, tone of voice docs, and images. It takes the output from generic prototype to something that actually looks like it came from your company.
- Upgrade your workflow. In this guide we kept things simple: build in Claude chat, copy-paste to GitHub, deploy on Vercel. But Claude Code connects directly to your project files, editing, committing, and pushing from one place. Think of it as going from manual to automatic, in an environment built for development. Once you're there, look into Skills (saved prompts you can reuse) and MD files (a cheat sheet you leave for Claude with your preferences and goals).
- Think bigger. Interactive offer letters, candidate interview packs, role landing pages, onboarding guides. None of these need a developer. Just a recruiter with an idea and a chat window.
- Keep exploring. Anthropic offers free courses and certifications including Claude Code in Action and AI Fluency. Communities like PromptMates are great for peer support. And tools like v0, Lovable, and Bolt are worth a look too.
If you made it this far, thank you! By now, hopefully you've got a working sense of how vibe coding works. And whilst we've only scratched the surface of what's possible in this guide, it's more than most people have done with AI!
If you found this useful please do drop a comment on the post. And if you feel comfortable, share what you've built!
Let's get more and more recruiters building with AI!
Beginner guide complete. Stay tuned for our Intermediate coming soon!
Guide created by First
AI built to help you improve candidate experience when application volume is high.